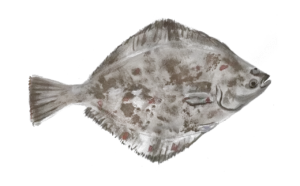
In this guide, we’ll go over the basics to filleting Flounders or Fluke, and there will be some overlap with filleting other kinds of flatfish.
Filleting a fish is an essential skill for anglers looking to cook the freshest possible fish, and it’s something that takes time and practice. While most fish are filleted similarly, all starting with a parallel cut along the spine, there are some differences between the techniques used for flatfish and for roundfish.
In this short guide, we’re going to explore how to fillet flounder, and the process will share a lot in common with filleting other flatfish, including Fluke, Halibut, and other species.
Filleting Supplies
Here’s what you’ll need to fillet a Flounder properly:
- Fillet knife (or a sharp knife)
- Boning knife
- Cleaver
- Two bowls (one for the fillets, and one for the carcass)
- Cutting board
How to Fillet a Fresh Flounder, Fluke or Other Flatfish
1 – Placing the Flounder or Fluke on the Cutting Board
When you position the fish for filleting, make sure that the dorsal or “back” side is facing towards you. Place the Flounder so that you can use your non-cutting hand to hold it in place as you make your initial incisions, as you will need to keep it steady to get a clean flounder fillet.
2 – The First Cut
Start with your filleting knife, and make an angular cut just behind the fish’s head, all the way down to the Flounder’s tail. This first step will also be the same for other flatfish, like the Fluke.
As you make this cut, be sure to hold firmly on the side of the fish, keeping it anchored with your non-dominant hand. This will ensure that the fish doesn’t slip as you make your incision, keeping the line of the cut smooth and ensuring that you don’t accidentally cut yourself.
As you bring the knife through the fish’s tail, ensure that you’re not slicing through the backbone, as you want your fillet knife to glide over the top of it.
To do this, you will need to gradually turn the filleting knife as it gets closer to the backbone, and it should end up in a position where the flat of the fillet knife is sliding over the bone.
3 – Gutting the Flounder or Fluke
The next step is to gut the fish, though keep an eye out for any roe while you’re doing this, as you won’t want any of it to go to waste. The roe will look like little orange sacs, and you’ll want to remove them carefully, being sure not to puncture them with the fillet knife as you remove them.
Removing the guts from a flatfish is simple, as you just need to follow the arc of the fish’s paunch with the point of your knife. This will conveniently slice out all of the guts, and you can just throw them away, as they can’t be re-used for much.
4 – Remove the Head
Removing the Flounder’s head is a more personalized part of the filleting process, as some people will do it at the start, whereas we do it near the middle. We like to keep the head on the Flounder for as long as we can, as it gives us a convenient spot to anchor it down with our off-hand.
Others will reason that they’d rather get the head off as soon as possible, as it will make it easier to fillet the rest of the fish. This is a matter of preference, so don’t worry too much about when you cut off the flatfish’s head, as long as it’s cut off cleanly.
To cut the head off, use a firm strike of the meat cleaver to ensure that it comes off in one clean slice. If you’re using parts of your fresh Flounder to make fish stock, be sure to remove the gills from the head. Use your filleting knife to slice the tendons holding the gills in place and throw them out.
5 – Skinning and Cleaning
Since most Flounder recipes call for skinning, this is also an important part of the filleting process. Grab the Flounder fillet by the tail and hold it firmly, positioning your filleting knife between the skin and the meat. You will want to slice along the fillet, almost scraping the skin off of the meat with the blade.
Once you’ve skinned your flatfish fillets, be sure to trim them until they’re somewhat uniform, as that will make it easier for them to cook uniformly.

How to Double Fillet a Flounder, Fluke or Other Flatfish
If you’re going to fillet a larger flatfish like a Halibut, then the single fillet technique won’t be as efficient as the one that we’re about to show you. The double fillet is ideal for getting the most meat out of the largest species of flatfish.
1 – The First Cut
The first incision you make when double filleting a Flounder should be along the fish’s backbone. If you have trouble finding the backbone, look along the side of the fish near the gut, and there should be a straight ridge that you can follow with the tip of your blade.
2 – Disconnecting the Bones
Once you’ve made the first cut, angle your knife so that it runs between the bones and the rest of the fish’s meat. Move the blade from the back off the fish, all the way up to the top, gradually separating the meat from the bone. Be careful not to cut too aggressively, as you may leave some meat stuck to the bones.
Once you’ve sliced along one side of the backbone, bring around the knife and free the rest of the meat from the bone on the other side. Be sure to do this for both sides of the fish, as the bone will still be stuck to the meat otherwise.
When the meat is free from the bone, you should be able to puncture the skin and remove it from the carcass.
3 – Skinning and Cleaning
There is little difference between skinning and cleaning a single fillet and a double fillet, but there are some cases where you may not want to skin a larger fish like a Halibut.
If you’re skinning a larger flatfish, you may want to make fillet steaks, and those are better left with a strip of skin on the underside.
You may also like to read, How to Fillet a Bluefish