Using a minnow trap is a great way for a fisherman to passively catch their own live bait. With the help of some bread or fish food, you can lure minnows as well as other baitfish into your trap. Follow our step-by-step guide in order to catch more live bait with the use of a minnow trap. It is easy to set up and is an extremely effective method to catch live bait.
Step 1 – Gathering Supplies
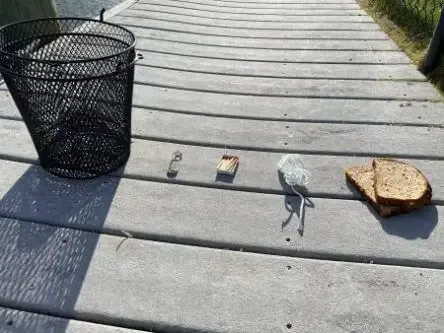
The picture to the right shows the supplies that are needed to successfully set up your trap. The minnow trap will include two steel cages that connect with a latch. The latch will also be included with the purchase of the trap.
Next, you will need rope. The rope doesn’t have to been too long as it really depends on the depth that the trap will be dropped from. Usually a range of 8-12 feet works well for most scenarios. To the left of the rope, their are matches. The matches can be used to burn the ends of the rope. This decreases the likelihood that the rope will fray. Lastly, we have the bait for the trap – bread. Look around the house for bread. Old bread works perfectly well.

Favorite Trap – Gees Feets G-40 Minnow Trap
If you need to purchase a reliable minnow trap at a fair price, I recommend the G-40 Minnow Trap from Gees. Their trap satisfies almost all states laws relating to minnow size dimensions as well as the entrance holes. The trap is constructed by galvanized steel at 16.5 inches in length and 7.5 inches in diameter. I usually purchase a new trap each season and have even deployed 3-4 traps at once time to maximize my catch and gather more live baitfish for larger fishing trips.
Pros:
- Steel material holds up well and lasts throughout the year
- Large enough to catch 100+ minnows
- Small entrance holes to avoid baitfish from exiting the trap
- Lightweight and easy-to-use
Cons:
- May require a new paint job if the trap remains in the saltwater for an extended period of time
- Doesn’t come with rope or string
Top 3 Favorite Minnow Traps
Step 2 – Preparing Rope & Bait
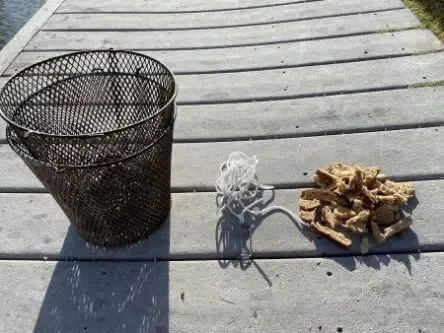
Use the matches to burn each end of the rope. At this point, you can tie the line to the latch that will be used for the trap. The latch is not only used to connect the rope to the trap but also allows the trap to be opened and closed.
Next, prepare the bait to be placed into the trap. I started with two slices of bread and ripped the bread into small pieces (as seen in the picture to the right). Breaking the bread into pieces allows for the bread to be more edible for the baitfish to consume. It also allows for the bread pieces to exit the trap and lure baitfish around the area to the original source of the food.

Step 3 – Deploying the Trap
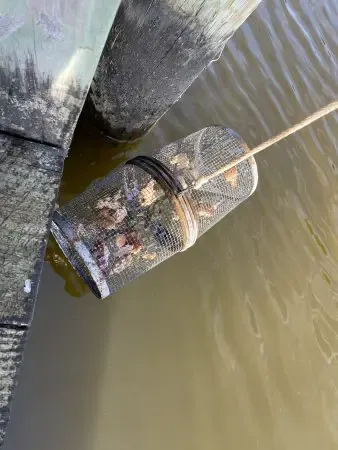
After putting the bread in the trap, it is now time to close the trap. Line up the clasps located on the top and bottom of the trap and use the latch to connect the top hooks. Squeeze the latch open and attach to the top two hooks. Before you drop the trap in the water, be sure to test that the trap is closed all around. Also, make sure the rope is secured on land. As seen in the picture, I will wrap the rope around the cleat on the dock.
When deploying the trap, you need to be aware of the tide. During low tide, you want to make sure that your trap remains in the water at all times. If you fail to do this, you not only lower the chance of catching bait but you can potentially have your caught baitfish pulled out of the water for the extended time that low tide lasts.

Step 4 – Waiting for Results
Depending on the location of where you placed the trap, you will need to wait the minimum of 4-6 hours to see any sort of results. Try to avoid continuously pulling the trap out of the water while you wait for results. For the best results, I recommend leaving the trap in the water overnight for 2-3 days. As you start to catch minnows, there is no reason to be concerned about them exiting the trap. The trap is designed to be easy for fish to enter but hard for them to leave. The torpedo design on each end of the trap helps with this process. As long as the trap remains level in the water at all times, you should expect to catch fish.
Adding more bread to the trap is a great way to continue luring baitfish to the trap. The original bait in the trap should last at least 4-5 days before needing to add more bread.

Step 5 – Success!
Three days later, I checked the minnow trap and was glad to see that it had caught 15 minnows! These minnows are known as mummichogs or killifish. “Killies” are one of the more popular baitfish available in the waters of the Atlantic Ocean. These baitfish not only produce terrific results for fishing but they can stay alive for a long time, even under harsh conditions. As long as the gills of the killies stay moist, the fish should stay alive.
At this point, you can remove the baitfish and use them to go fishing. You can also leave the fish in the trap, add some more bread, and re-deploy the trap in order to try and catch more! Usually, I strive to remove the smaller minnows and release them. I probably won’t be using them for bait since they are too small for the hook. Live minnows are an extremely effective method for catching a wide variety of fish.
Catching your own live baitfish can be an extremely easy process with the help of a minnow trap. Learning how to use a minnow trap may be the best way to save money on buying live bait!


